Tuesday, October 14, 2014

Day 13: Having Fun

Wow, did that go by fast, today was the last day of class.  I would definitely recommend taking this On-Line-Class, Copic Markers for Card Makers.  We learned an over whelming amount of information on using Copic Markers.  For my final card I used Kristina Werner's Warm Wishes Card with a few substitutions.  I like how it turned out using a My Bestie image in place of the Greeting Farm one Kristina used.  As they say in the movies that's all folks for this On-Line-Class, but not my blog.

Happy Holidays


Day 12: Copic Hacks + Marker Maintenance

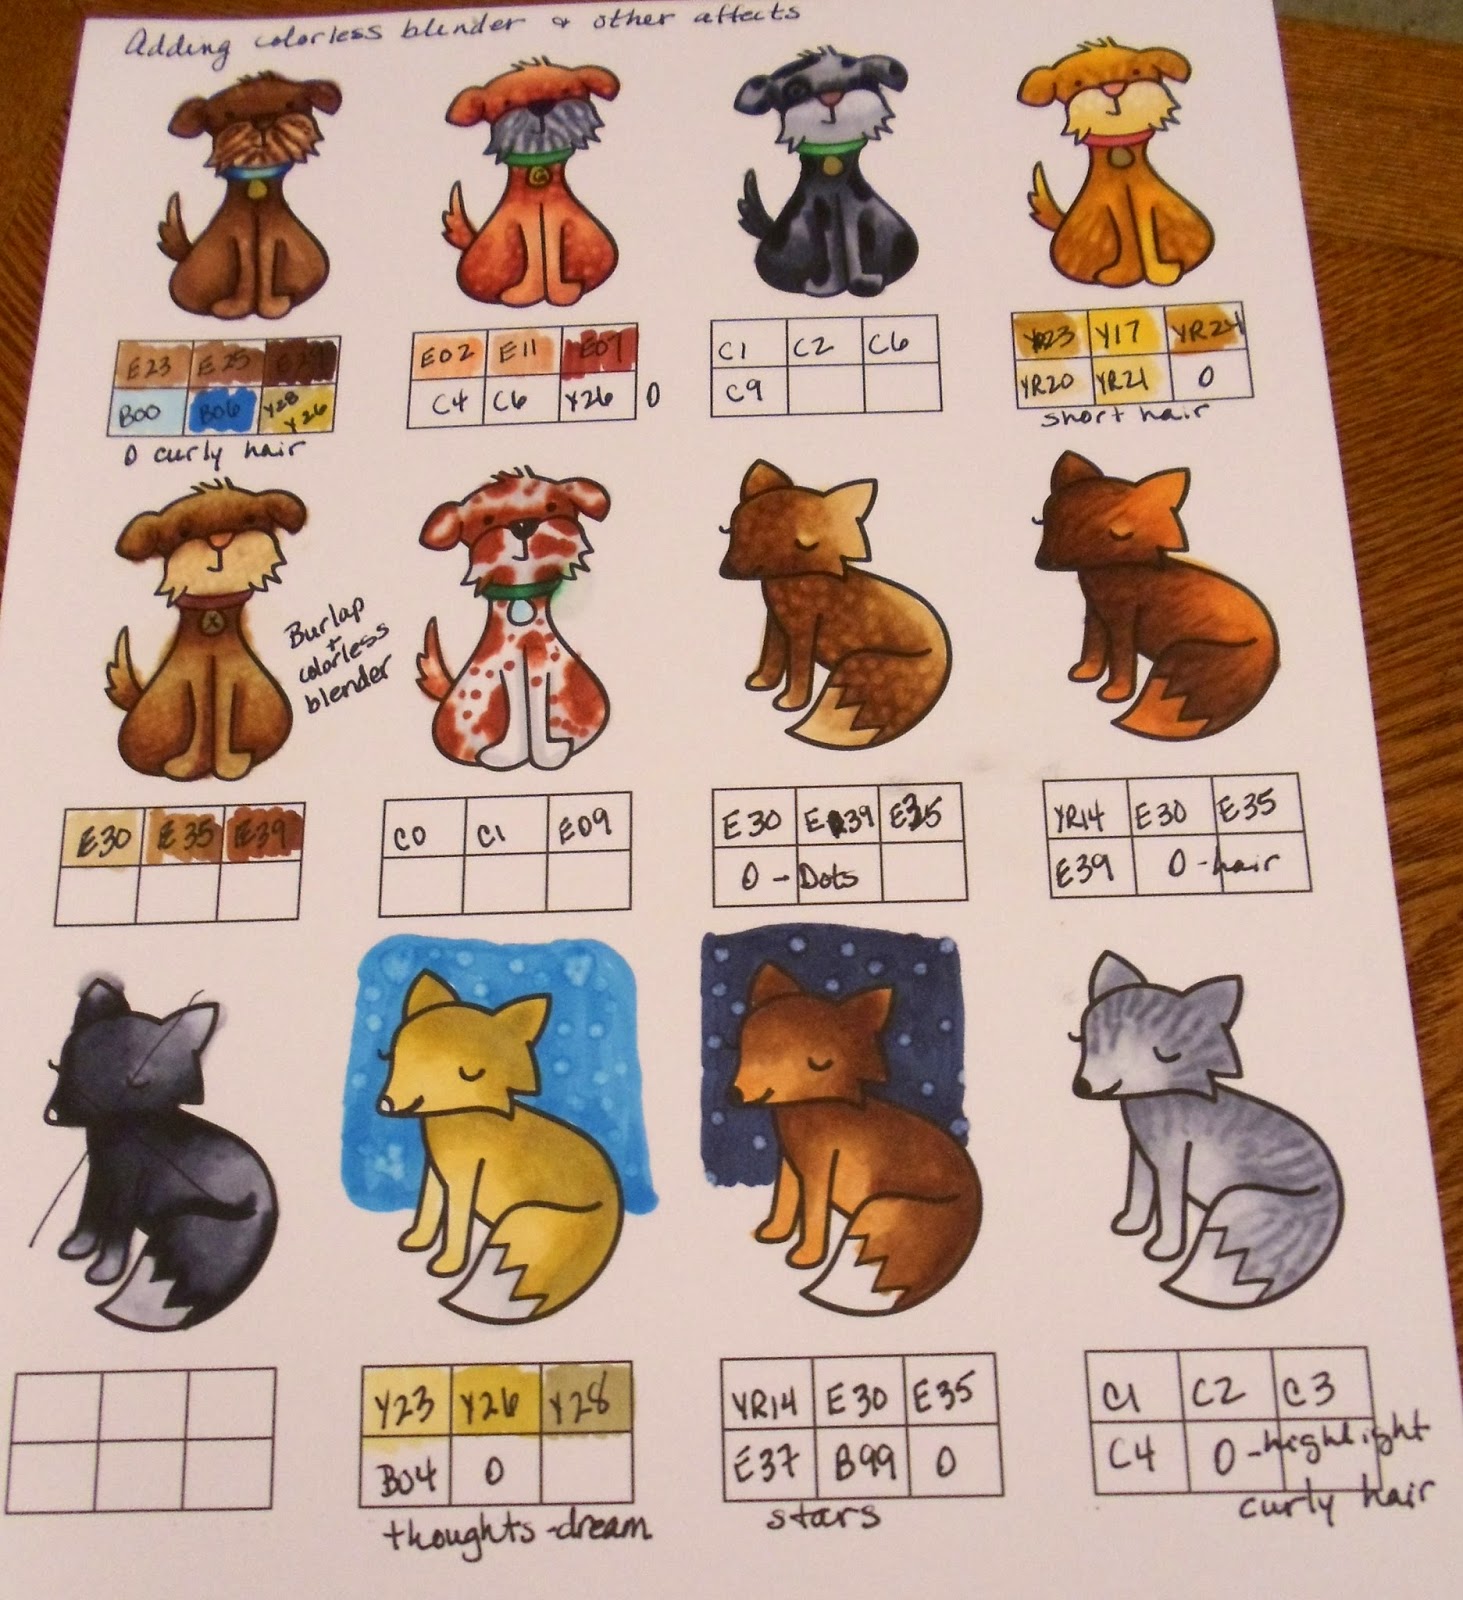
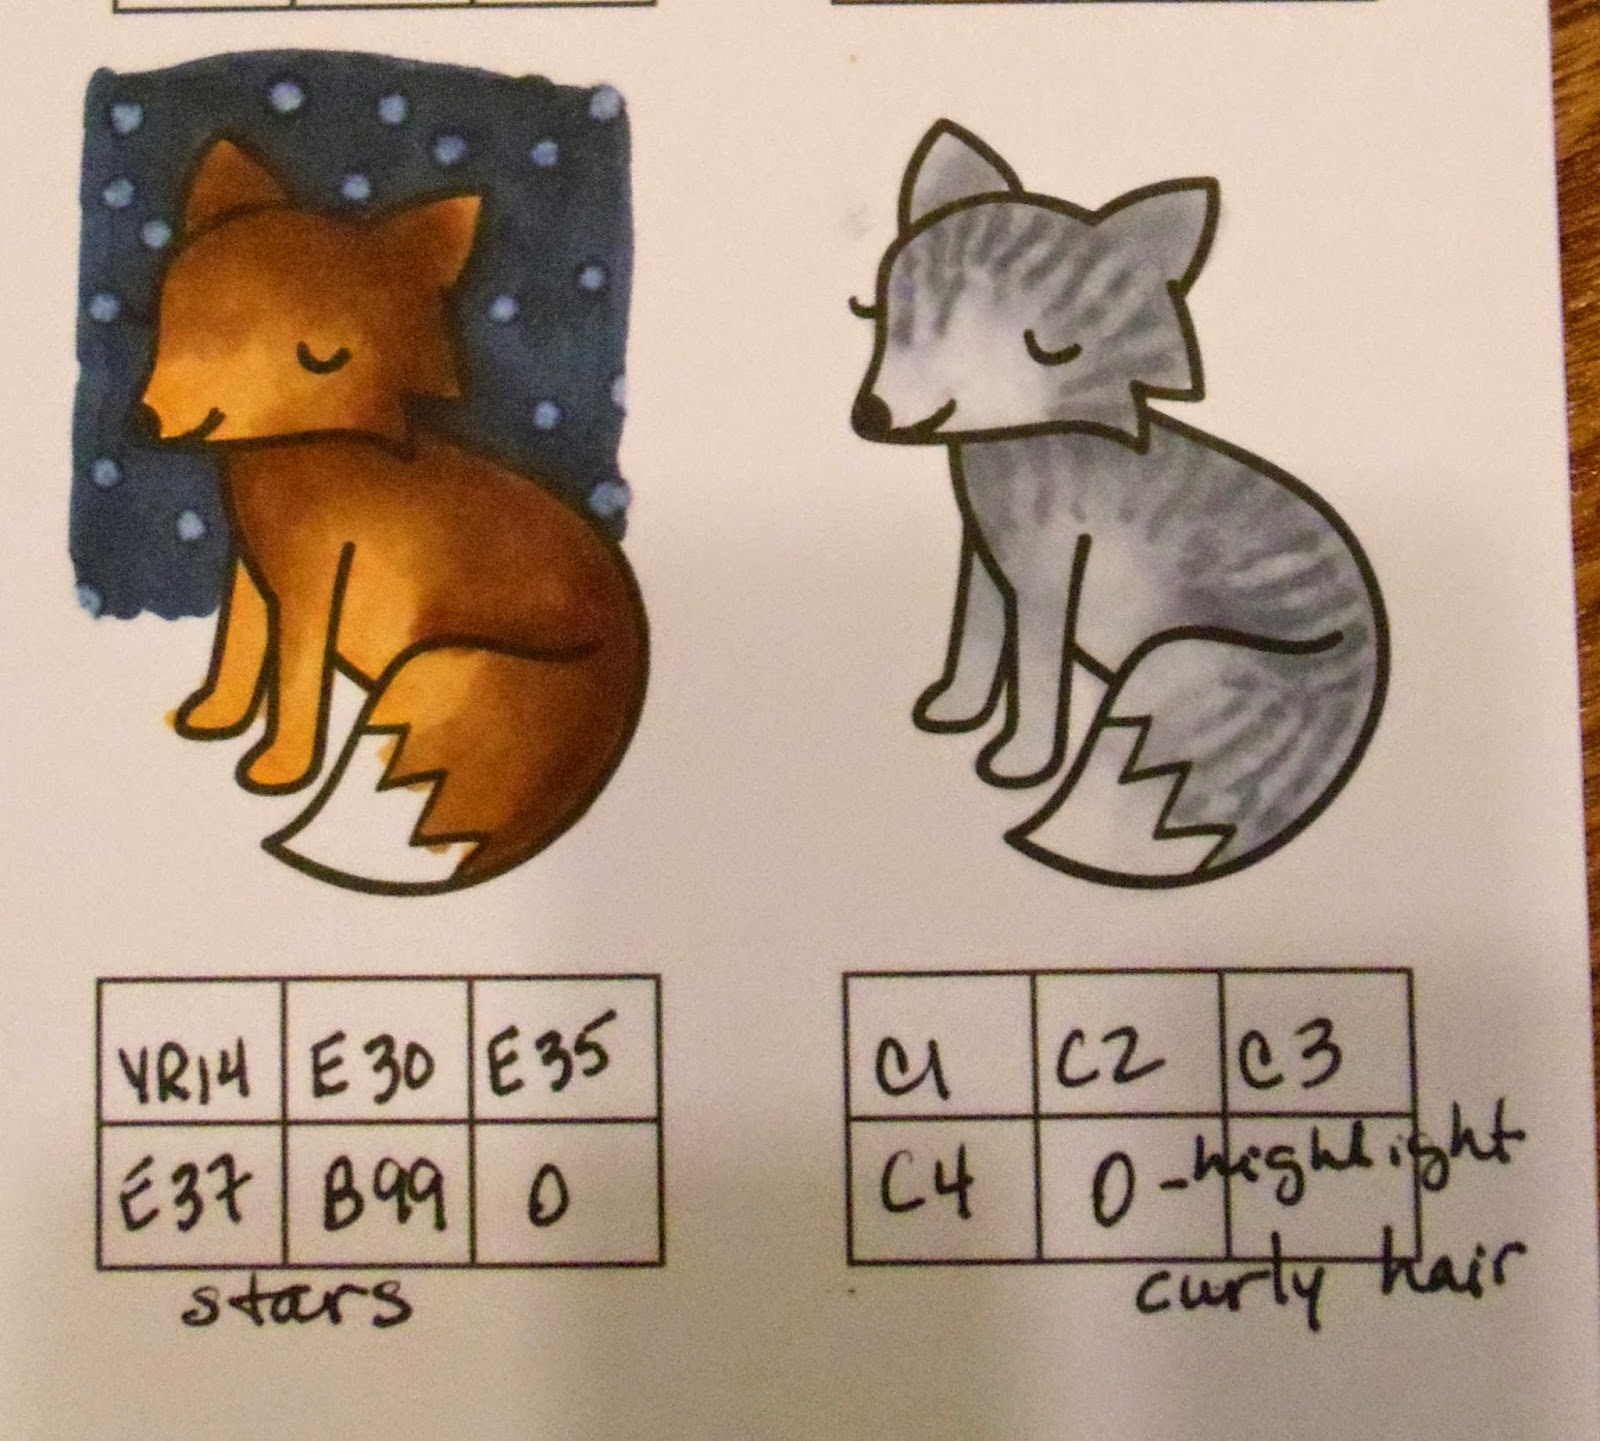
Welcome to day 12 of On-Line-Class, Copic Markers for Card Makers.  Ahhh, Copic Hacks and Marker Maintenance class.  What did we learn today, sorry but I can't tell, because it's 11 secrets, shhh, for using Copic Markers.  Okay I'll spill the beans, you can use Copics to, color paste, ribbon, twine, paper, buttons, rhinestones, pearls, veneers and sequins. . . phew!  Now onto maintenance for your Copic Markers; replace nibs, clean caps and refill markers.  It's all in a days work or should I say play.

Day 11: Hiding Mistakes

We all make mistakes, we go out of the line or oops, we make a mark on the card stock and many other blemishes that don't belong.  Conjure up the colorless blender and push the color back into the image, white ink on the oops and bye, bye mark and my favorite, add an embellishment on top of the blemish.  Yikes I picked a toughie card to practice today.  Ummm, glad today was how to hide mistakes, there are several on this card!

Another Christmas Card (mistakes are hidden)


Day 10: Finishing Touches

How do you make that card really pop and standout?  On-line-class had the answer.  Add some white detailing to your images, put a halo around the image, use die cuts to add special effects and/or add your embellishments colored to match the image, card stock, you pick whether to mix or match.  In my practice cards below I added white ink (swirls and highlights), embossed Thank You and die cut sentiment Merry Christmas and last I added some stickles, enamel dots and gem embellishments. Cute card for Christmas, I'll be adding it to my stash.

White Ink Highlights
Finishing Touches Added


Day 9: Backgrounds

Sandy Allnock taught us several techniques to create different backgrounds.  She's awesome!  I had to substitute different animals for the rabbit Sandy used but they are still cute.  I also had to draw in some of the flowers and bubbles because I didn't have the same stamps.  Really I wanted to practice the background techniques and wasn't too concerned with the subject this time.  Below are some of my attempts at the backgrounds.  Not too shabby if I do say so myself. . .I know practice, practice and more practice.  A little added pleasure from Kristina Werner, stripes and banner background just in time for a Happy Halloween.

Brick background
Night-time

Cloudy skies

Rainbow and dreams


Happy Halloween Stripe and Banner

Wednesday, October 8, 2014

Day 8: Cards Using Practice Sheet Images


Oh what fun, we are making cards using the images from our practice sheets.  I used the instructions from the On-Line-Class Teachers to create my cards.  My cards wouldn't win any prizes but then they are practice.  Hopefully with continued practice they will get better.

Happy Birthday Balloons
Love


Hello Doggy

Hello
Colorful Thanks


Day 7 Part 2 Difficult Colors

Sandy Allnock also showed us how to blend dark gray with black.  Wow she is so talented even when she purposely makes mistakes and then uses the mistake for a background.  More practice for me.
Practice and more practice

My warm colored robot 

Day 7 Difficult Colors

Glad we were able to cover difficult colors in class today; especially the reds.  I like using red for coloring Christmas images but they are difficult to blend and they have a tendency to bleed.  Sandy was able to blend effortlessly using reds.  She also used gray tones to add shading to white.  Below is my practice sheet.  I plan on making some cards using the flowers hopefully in a later post.


Practice Sheet
Close up of blue flower
A close up of the blue-green flower


Thursday, October 2, 2014

Day 6 - Colorless Blender Tricks + Coloring Animals and Texture

I usually use my colorless blender only when I need to correct a mistake I've made coloring.  I never knew it could be used for so many tricks and adding texture.  I used some of the techniques we learned in On-Line-Class in my practice sheet below.  The two foxes show how to create a starry night background and a curly haired one.  Falling a little behind trying to keep up with the class and finishing cards for OWH (the cleaning and laundry will just have to wait. . .).

Practicing colorless blender and  adding texture
My cute little foxes


Wednesday, October 1, 2014

Day 5, Hair and Skin with Copic Markers


On-Line-Class for day 5 was spent on coloring skin, hair and clothing. Several techniques were provided for coloring hair and skin.  My practice sheets are below.  Depending on the type of character and image will depend on which technique I will use.  The ballerina image drawn by Kristina Werner was my favorite to color.  Hair, skin and clothing can be seen in the ballerina.  Just changing the colors used can create a wide variety of ethnicity.

Practicing the various techniques for Hair and Skin


Red-Head
Different ethnicity coloring